8 laminate flooring installation tips that will stop you wrecking your new floor!
Before you start the installation on your own, it is a good idea to get a few laminate flooring installation tips. When you take the necessary steps to prepare for the installation of laminate flooring, you will avoid common mistakes and achieve a significantly better installation result.
The installation process is not complicated, just a process that requires time and patience.
Read our list of the eight ways to prevent the biggest mistakes that can wreck your laminate installation. You can also download the PDF version of this document.
Undercut doorframes properly and finish well, for a premium look.
Take your time to complete your work the correct way. Undercut all door-frames, use the right trims and matching silicone to fill any small gaps. Existing skirting should be removed and then reinstalled over the top of the new floor, rather than using a small quarter round trim against the skirting which can look inferior. Time taken to finish the floor properly makes a huge difference to the appearance of your flooring. Poorly finished laminate floors bring a poor impression of the interior.
Leave adequate expansion gaps.
Smaller rooms such as a 3m x 3m bedroom will be okay with say 8 to 10mm of expansion gap around the perimeter (hidden by skirting). However for bigger spaces as well as commercial installations, above 13 metres in length at least 12-13mm clearance against walls is necessary. If you do not leave enough expansion gap, the floor can expand into walls or vertical surfaces, causing the floor to buckle.
Using the wrong trims.
Using the correct shape trims with laminate flooring is crucial. The trims must allow for expansion and contraction of your laminate floor. Typically we use a U-shape trim that will hold down the laminate and allow expansion inside the trim. These trims can be powder coated to your colour of choice if required. Never use an L-shape tile trim with laminate flooring as the floor cannot expand against these trims.
Any window joinery at ground level (such as ranch-slider joinery) also needs a U-shape trim along the length of the joinery to hold down the laminate and allow expansion contraction. Some installers just leave a gap and put silicon. However, this method is not technically correct. Most likely the silicon will deteriorate over time, and gaps will appear in it, especially as the floor will move as you walk over it (without having a trim to hold it firm in place).
Tap laminate only if manufacturers allow.
New generation laminates are constructed to “click” together. There is no need to tap the edge of the boards unless directed in the flooring installation guide to use a tapping block. By hammering planks together, you will damage the high-tech locking system and your floor will not lock properly.
Installing wood laminate flooring under kitchen cabinets.
Floating floors need to expand and contract freely. By installing laminate all the way under heavy kitchen units, you are creating a ‘pinch-point’, and the floor can no longer move as necessary. During winter and summer, your floor will expand and shrink with humidity fluctuations. If the floor cannot expand and contract freely, then it may start lifting in some areas.
Always install laminate around the kitchen units and islands – you can install to within about 1cm of the internal feet. Kick panels should be fitted last to complete the kitchen area.
Unintentional installation of wrong or defective laminate planks.
Inspect all laminate planks before installation to ensure they have the correct pattern, style and colour and are free from visible defects. Once the wrong or damaged laminate is installed, it’s hard to replace it. All manufacturers of laminate flooring will not pay labour charges or replacement on claims filed for materials installed with obvious visible defects. If you find any flaws, contact your laminate supplier for assistance before continuing with the installation.
Installing flooring over an uneven sub-floor.
The quality of your sub-floor plays a very significant role in the performance of your laminate flooring. Many older houses have imperfect sub-floors and need additional levelling to ensure a level substrate. Even new concrete slabs can be quite uneven. An uneven sub-floor will result in your laminate floor moving up and down as you walk over it. The end effect over time will be a damaged locking system, micro-gaps between boards and poor floor performance.
If your sub-floor has major problems, do not expect that a good underlay and thick laminate will take care of it. In most cases, you do not need the sub-floor to be perfect, but you should level it to an adequate standard. Check the manufacturer’s minimal requirements or install to NZ flooring standards; ask your supplier for more information on sub-floor requirements.
Wrong underlay choice.
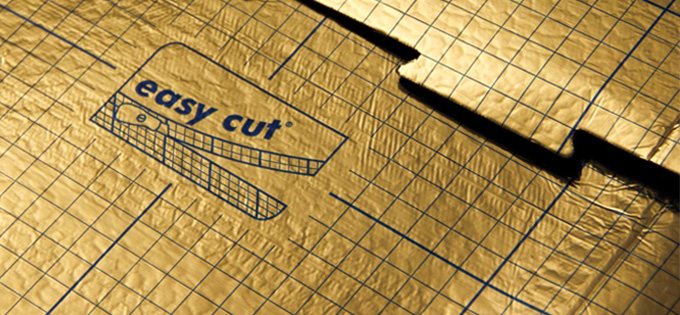
Laminate flooring requires an underlay underneath the flooring. That is mostly to help your floor to “float”, to help absorb small undulations or bumps as well as to reduce walking and impact sound. There are several underlay choices on the market – some only offer ‘impact sound’ reduction going through to the levels underneath. Other underlays provide both high ‘impact sound’ and ‘walking sound’ reduction (these more advanced underlays, such as SELIT Aquastop, are mostly manufactured in Europe).
It is important to use a waterproof underlay when installing your laminate over concrete. Even old concrete slabs hold moisture that will migrate into the underside of the laminate floor, causing excessive expansion unless there is a waterproof underlay barrier between the concrete and laminate.
We hope you learned a lot from the above laminate flooring installation tips. Keep in mind that you can always count on our German-trained installation team.
